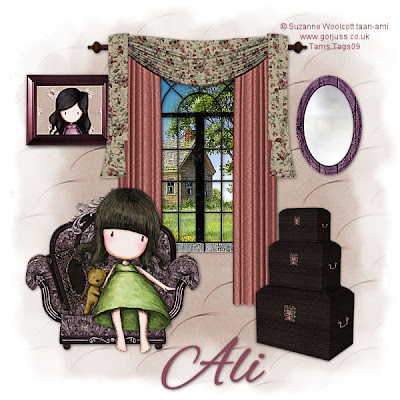
I wrote this tutorial on June 8th 2009. If it resembles any other tutorial out there it's purely coincident. I used PSP X to create this tag but you should be able to use any version.
Supplies you will need:
Tubes of your choice. I used the fantastic artwork of Suzanne Woolcott. You must have a license to use her artwork. You can purchase on here.
The scrap kit I'm using a beautiful FTU kit by Designs by Ali. Beautiful kit hun. You can download it from her blog here.
An image of choice.
Mask of choice
Lets begin:
Open a new image 600x600. We can crop and resize later.
Choose a paper from the kit and open it on your workspace. Minimize it and then click on your materials pallet and go to pattern and find the paper you opened. Set the angle to 0 and your scale to 25. Add a new raster and flood fill with your paper.
Find the mask you want to use and apply. Merge your group.
Choose a window from the kit and resize and paste as a new layer. Move it up toward the top of your mask layer. Grab your freehand selection tool set at point to point and go around the window frame. Resize the image you want to use and paste as a new layer. Move below the window frame and go to selections invert. Hit delete on your keyboard. Dropshadow your window with shadow of choice.
Open on of the drapes from the kit and resize paste as a new layer. Position around your window. When happy with position dropshadow drapes.
Open a mirror from kit. Resize and paste as a new layer. Position where you like and then dropshadow.
To make the picture I have in my tag I opened one of the frames and clicked in the center then went to selections and modify expand by 5. Open another paper from you kit and paste as a new layer move below the frame. Go to selections invert and delete the excess paper. Don't deselect open one of the tubes you want to use and paste as a new layer move below frame. Hit delete to remove excess tube. Dropshadow your tube. Now merge visible. Resize and paste as a new layer on your tag. Position where you like and then dropshadow.
Open a chair from the kit and resize. Paste as a new layer and position where you like. Dropshadow.
Open the nesting boxes. Resize and paste as new layer position where you like. Dropshadow.
Paste your tube and position where you think she looks best and dropshadow her. If you need to resize the tube make sure you use smartsize.
Resize your tag and add your copyright license number if needed.
Find a font you like and apply your text. Dropshadow.
Save as a Jpeg or Png and thats it your done. I hope you have enjoyed this tutorial.


No comments:
Post a Comment